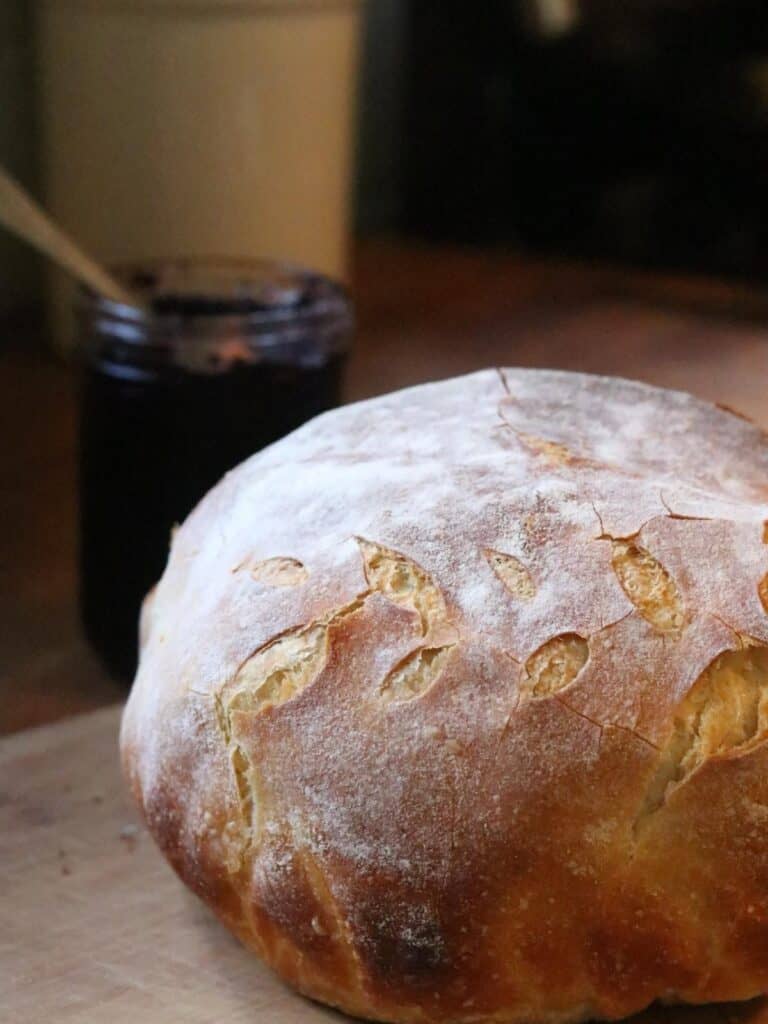
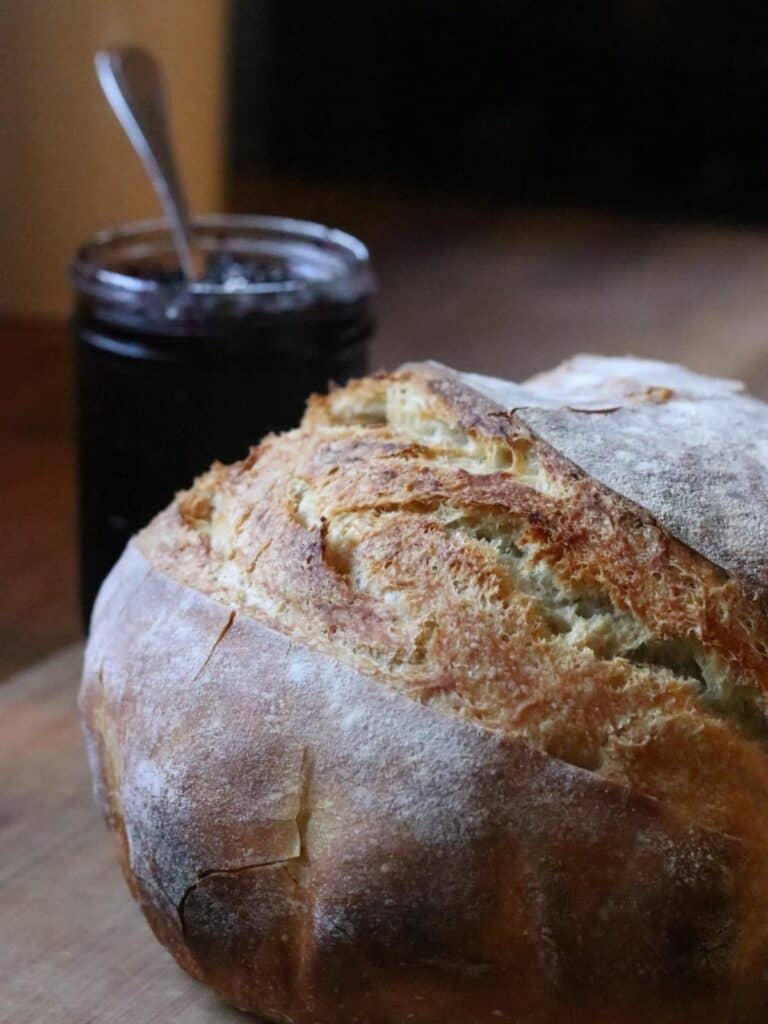
This Easy Homemade Blueberry Jam Recipe is simple to make with either fresh or frozen blueberries. It’s a wonderful way to preserve a bountiful harvest or use up any extra berries after a trip to your local u-pick. It makes the perfect topping for biscuits, muffins, or even a classic PB&J. Whether you make a small batch for the fridge or can enough to stock your pantry shelves, this blueberry jam recipe is one you’ll come back to every summer.

This post may contain affiliate links. This means I may earn a small commission if you purchase through my links at no extra cost to you.
A Little Homestead Story
We don’t have any established blueberry plants on our homestead yet, so every summer we head to one of the local organic farms nearby to pick. The season is so fleeting, but it’s one of our favorite summertime traditions. With nine of us picking, we can usually gather many pounds of blueberries in just a couple of hours.
This year, things were a little different. One farm lost their entire crop to damaging storms, and another was open for less than a week before every last berry was picked!
So, I decided to stock up on frozen blueberries from Azure Standard, where I often order bulk ingredients. I added a 30-pound box to my order and we were set. Or so I thought.
Long story short: one of the boys unplugged our big freezer to plug in a heat lamp for baby chicks, and forgot to plug it back in. We discovered it several days later, and everything inside had thawed. All of it had to be dealt with immediately, including the blueberries. (That’s a story for another post.)
I probably could’ve refrozen the blueberries, but I felt better cooking and preserving them—so we made lots of blueberry jam!

Why You’ll Love This Homemade Blueberry Jam Recipe
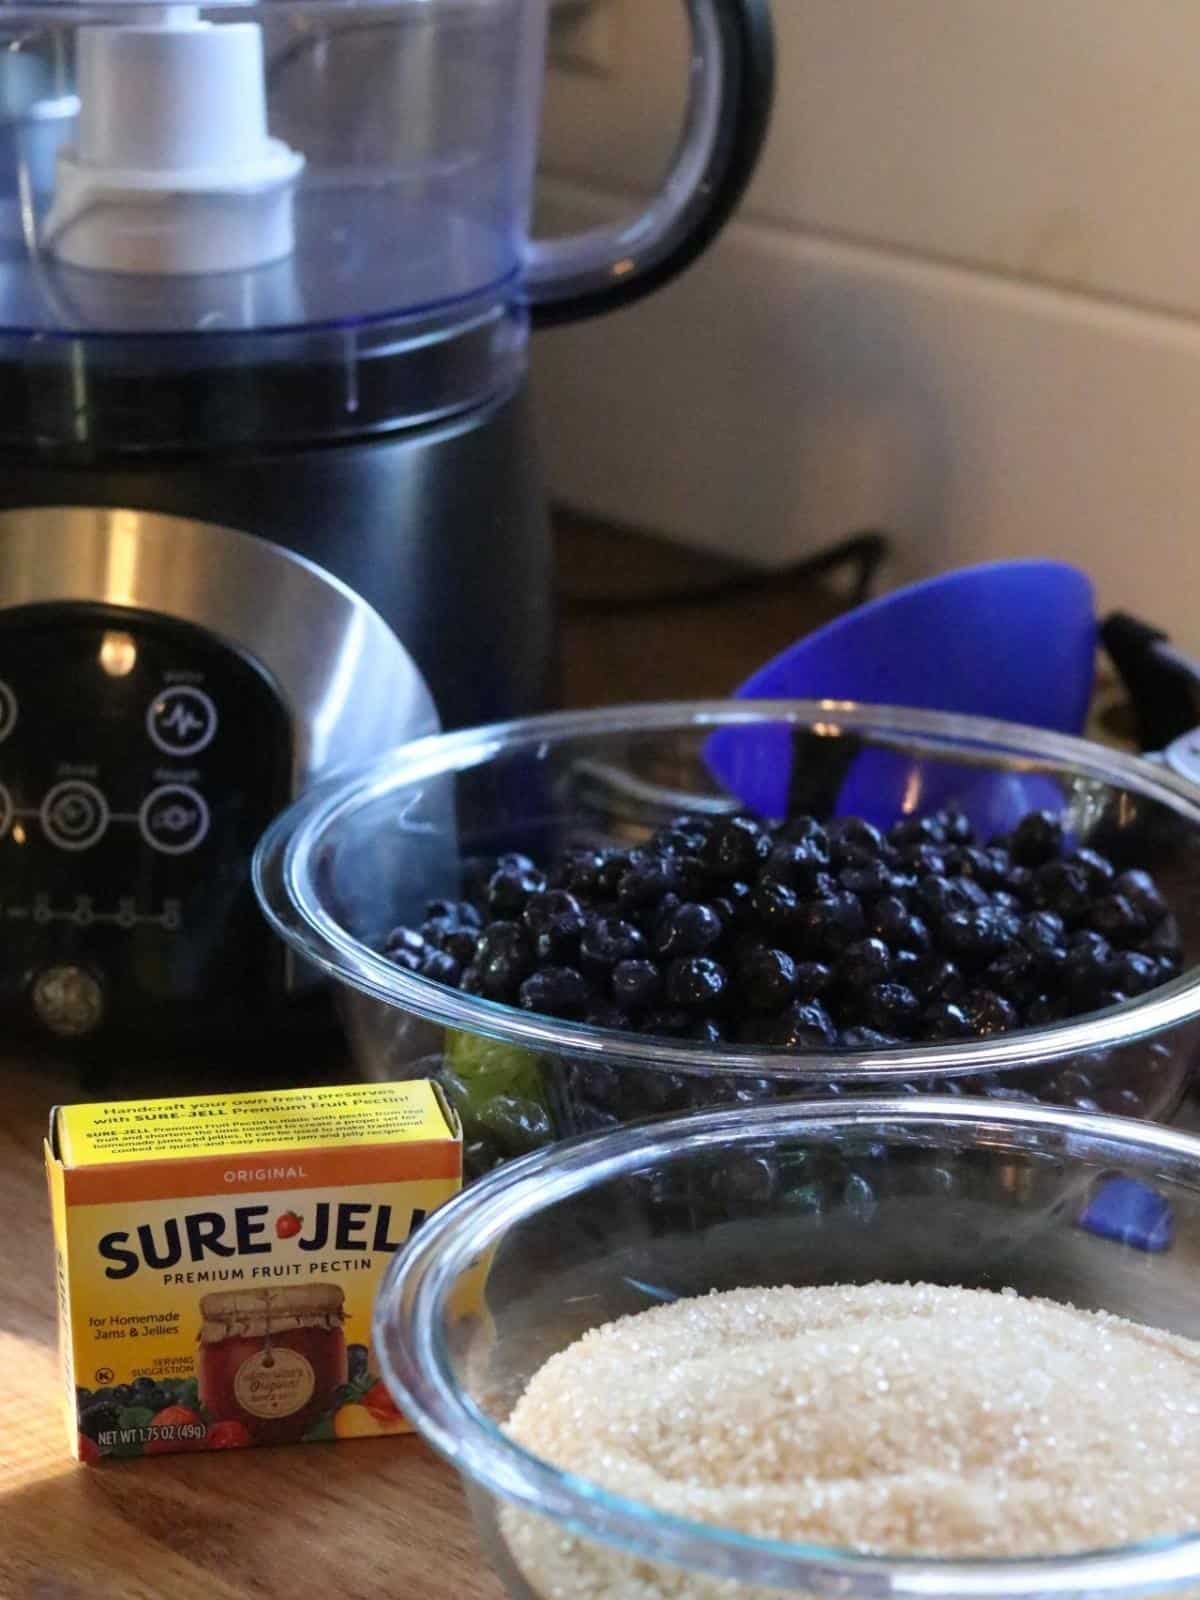
Ingredients You Need To Make This Blueberry Jam Recipe

Ingredient Notes
What type of sugar should I use?
I prefer organic cane sugar, but any granulated sugar will work.
Do I have to use Sure Jell?
There are many types of pectin, and each has different directions and ratios. This recipe uses regular Sure Jell, so for best results stick to that one.
Can I skip the added pectin?
You can make jam without added pectin, but the process, sugar ratio, and cooking times are different. If you’re looking for a blueberry jam recipe without pectin, you can make this version naturally — I’ll share a few tips for that below.
Why is the lemon juice optional?
Blueberries are a high acid food, so they can safely be canned in a water bath without adding extra acid. However, Sure Jell does contains citric acid, which helps the jam gel and also lowers the pH. For safe water bath canning, foods need a pH of 4.6 or lower. I checked my jam with a digital pH tester when it was finished, and it measured 2.5 — well below the safety threshold. Any food with a pH above 4.6 should be canned in a pressure canner.
Neither of the tested blueberry jam recipes I reference call for added lemon juice. The two I use as guides are the Sure Jell recipe and the Ball Blue Book Guide to Preserving, both of which rely on the natural acidity of the blueberries (and, in the case of Sure Jell, the citric acid in the pectin) to safely gel and preserve the jam.
When to add lemon juice: You might add lemon juice if you’d like to balance the sweetness of the jam, since it does contain quite a bit of sugar. If you’re making jam without added pectin, lemon juice (or citric acid) can also help the fruit gel properly.
Tools & Equipment (for the blueberry jam)
Tools & Equipment (for water bath canning)
Shop the Tools


Before you begin:
Inspect each jar for chips or cracks—especially along the rim. Even a small chip can prevent a proper seal.
Preheat your oven to 225°F. Wash the jars and lids in very hot, soapy water, then place the jars in the oven to keep them warm until you’re ready to fill them. (I don’t sterilize my jars first, see why here.)
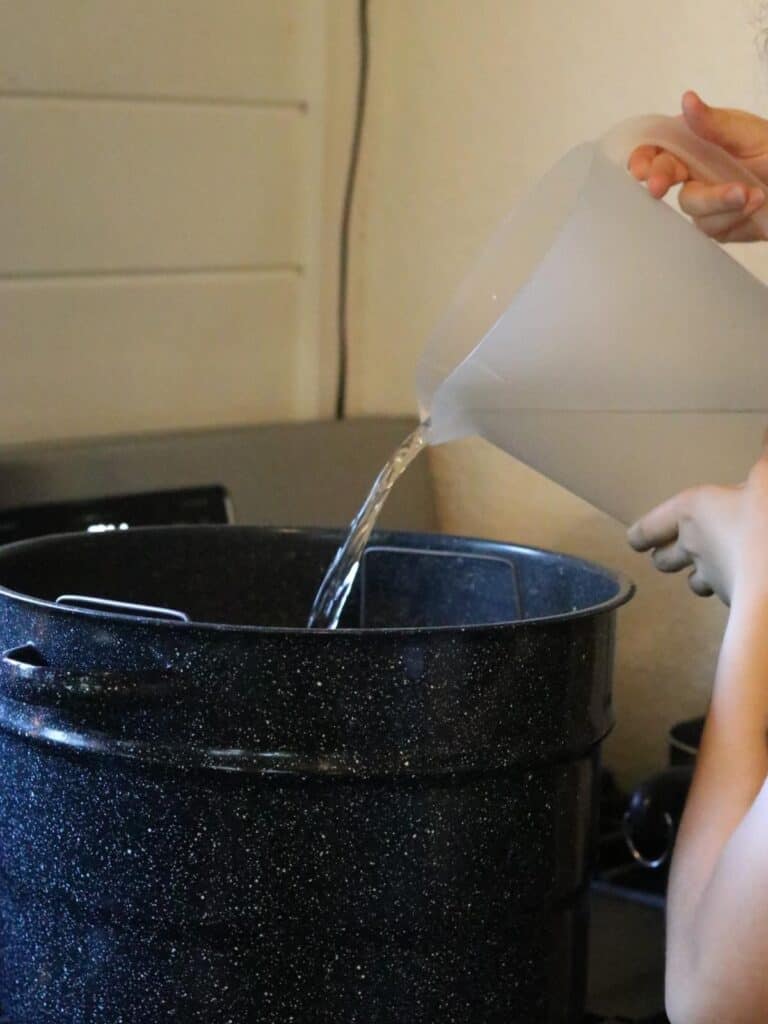
Fill your water bath canner halfway with water and begin heating it on low.
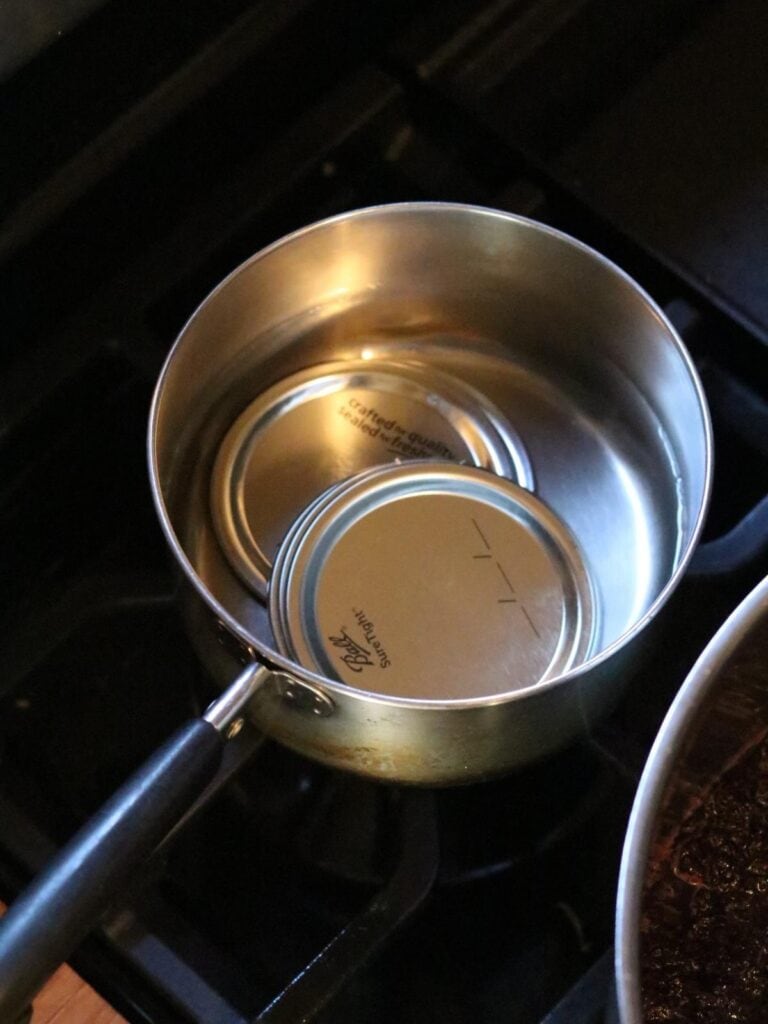
In a small saucepan, heat your lids on low with just enough water to cover them. (Don’t boil; just warm them.)

Please see recipe card at the bottom of this post for the full recipe details.
How to Make This Blueberry Jam Recipe (Step-by-Step) – With Pectin
- Gather your ingredients and supplies.
- Measure 6-7 cups of blueberries into a large bowl.
- In a medium bowl, add 4 cups of sugar and set aside.
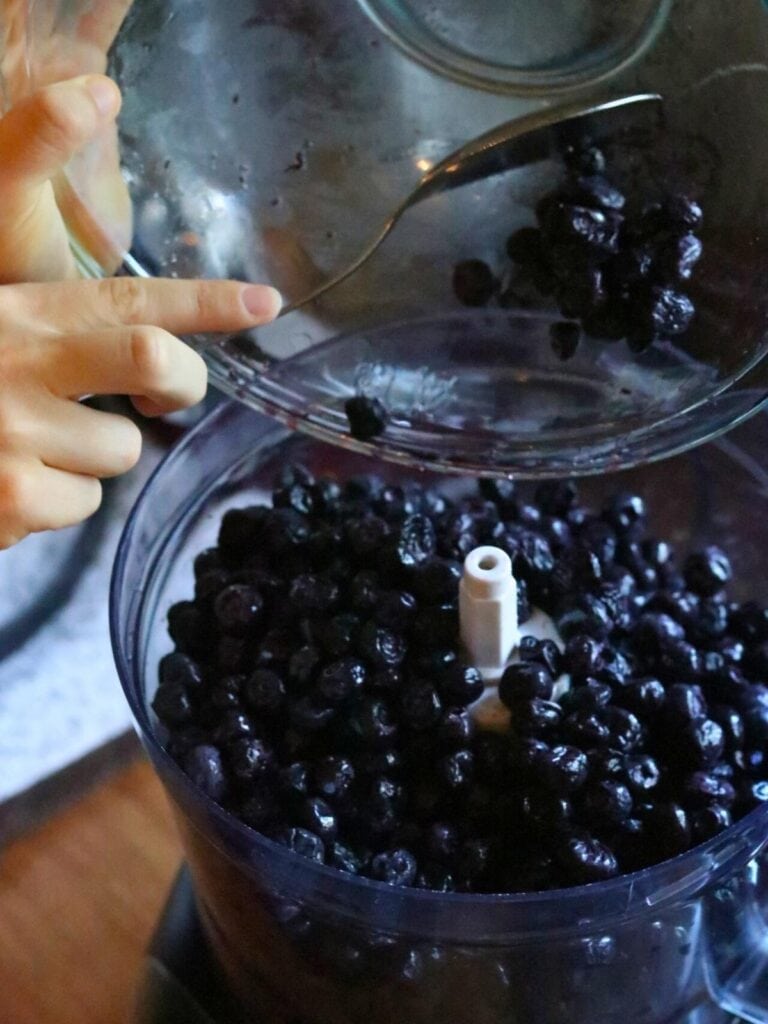
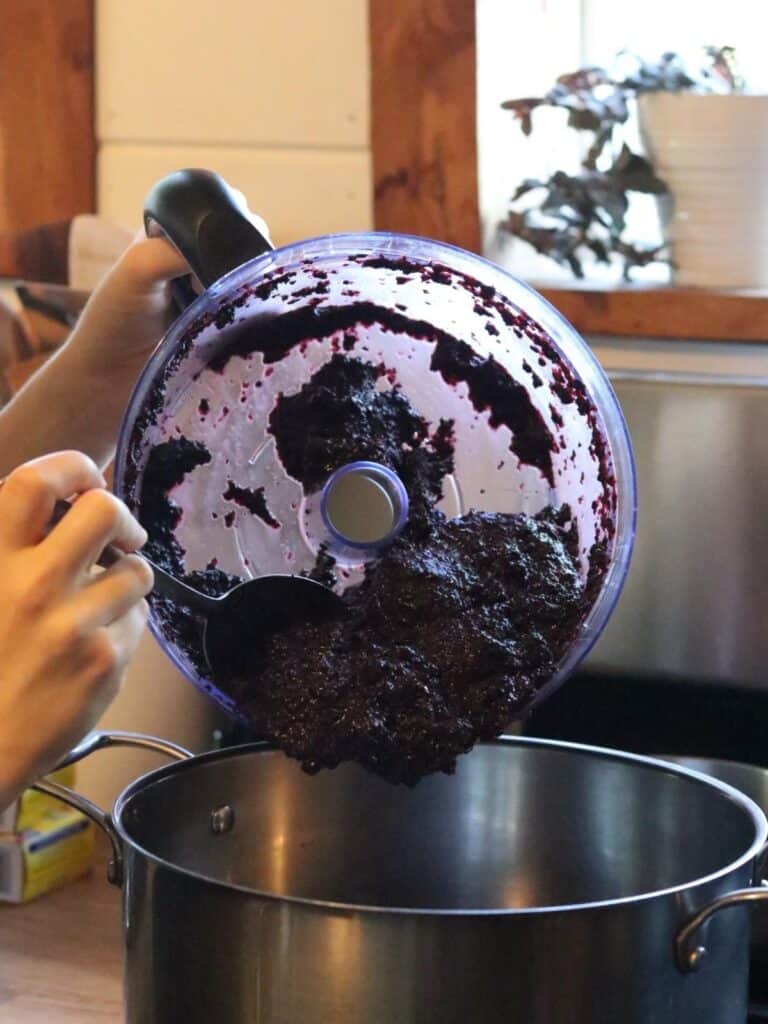
- If using frozen berries, pulse them in a food processor to chop. (Skip this step for fresh berries.)
- Place the berries in a large saucepan over medium heat.
- Add one box of Sure Jell pectin and stir.
- Cook over medium-high heat, stirring frequently, until it reaches a full rolling boil that cannot be stirred down. (Mash fresh berries during this step.)
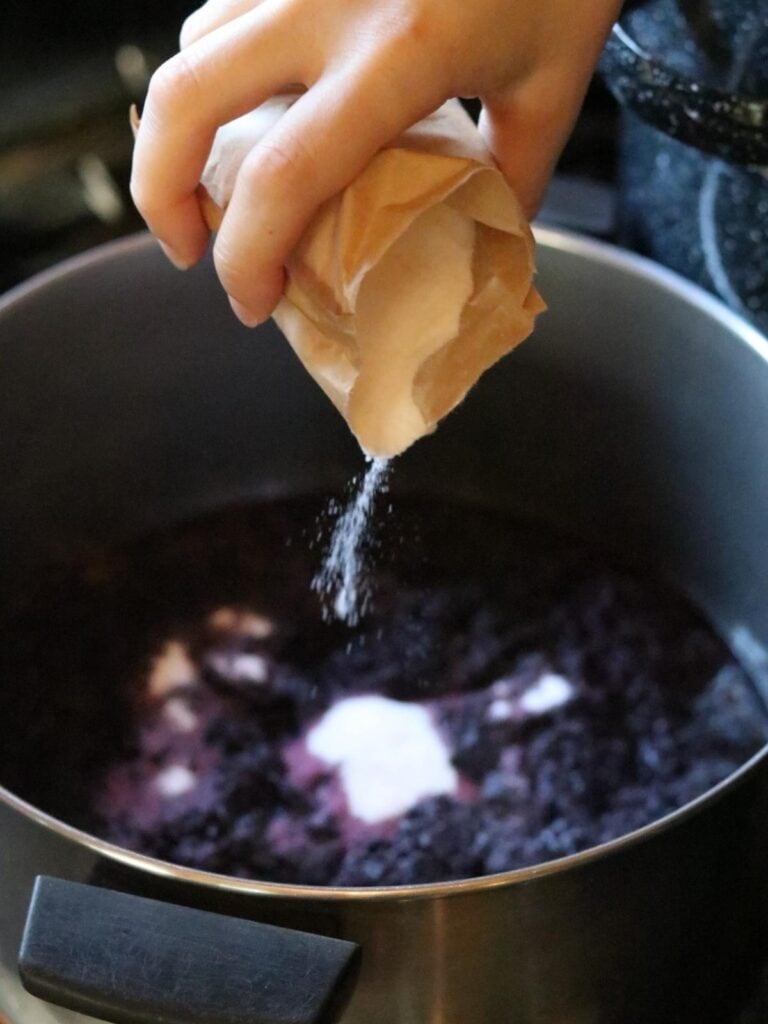
- Add the sugar and stir to dissolve.
- Continue cooking until the jam reaches a full rolling boil again. Once it does, boil for exactly 1 minute, then remove from heat and skim off any foam on the top of the jam. The jam will still be like liquid at first, but it will set up quickly as it cools.
- You can either:
Let the jam cool to room temperature and store in the fridge or freezer, or
process in a boiling-water bath canner for shelf-stable jars.


If you prefer not to use commercial pectin, here’s how to make blueberry jam without it. Jam made without pectin will have a softer texture, while using pectin results in a firmer set.
How To Make Blueberry Jam Without Pectin
I adapted the ratio of ingredients based on our family’s taste preferences. The Ball Blue Book recipe calls for 9 cups of crushed blueberries and 6 cups of sugar to make 3 pints of jam — but that was way too sweet for us. Here’s how I make it instead:
- 9 cups blueberries
- 4 cups sugar
- 1 tsp citric acid (or ¼ cup lemon juice)
With this reduced sugar, I still ended up with 3 pints of jam. But I also didn’t cook it all the way to the gelling point, so that yielded a bit more.
- Follow steps 1–5 from the recipe above (using the ingredient ratios listed here).
- Add the sugar, stir until dissolved, and slowly bring the mixture to a boil.
- Cook rapidly to the gelling point, stirring often to prevent sticking.
- Once the mixture thickens, remove from heat and skim off any foam.
- Continue with step 10 in the recipe above.
Enjoy your homemade blueberry jam!
Once your jam—whether made with or without pectin—is cooked and ready, you can enjoy it right away or preserve it for later. If you’d like to stock your pantry shelves, here’s how to can blueberry jam using the water bath method.
Recipe Tips
For Canning:
*Small batch jam recipes make about 3 pints. To fill your canner, make two batches in separate pans. (It’s important not to double recipes that contain pectin, as this can cause the jam to fail to set properly. Not to mention it will boil over the top of the pan!)
*If you have the stove space, you can cook them side by side. Otherwise, start the second batch after you put the first set of jars in a preheated water bath.
Before we dive into canning blueberry jam, I want to pause for a quick note. These are the steps I personally use here on our homestead. Canning methods can vary, so it’s important to use your own judgment and follow safe canning practices.

Would you like to save this?
How to Can Blueberry Jam (Water Bath Method)
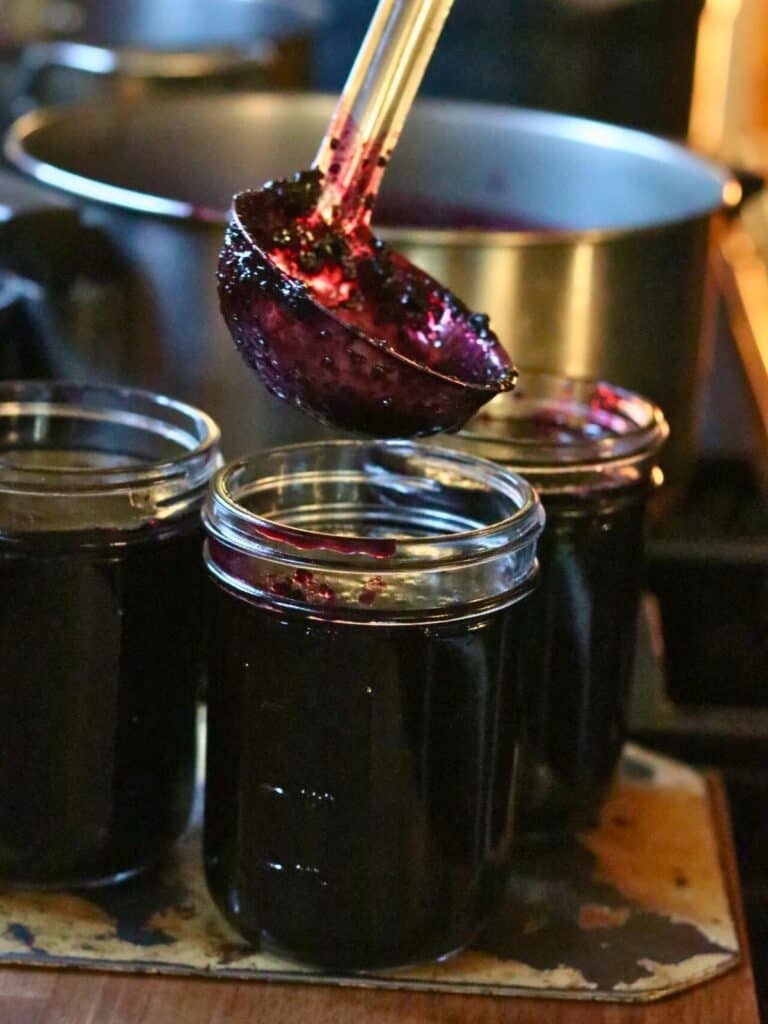
- Immediately after finishing your homemade blueberry jam, ladle the hot jam into your warm jars from the oven, leaving ¼ inch of headspace at the top.
- Wipe each rim with a damp towel to remove any residue — this step helps ensure a strong seal.
- Use your magnetic lid lifter to place a warm lid on each jar. Screw on the bands fingertip tight (snug but not overly tight).
- Use your jar lifter to carefully lower the filled jars into the canner, spacing them evenly.
- Add more hot water if needed until the jars are covered by at least 1 inch of water, then cover with the canner lid.
- Turn the heat up to high. Once the water reaches a full rolling boil, start your processing time.
- Process the jars for 10 minutes (adjusting for altitude if needed — see chart below). I often add an extra 5 minutes to the processing time for good measure.
- When the time is up, turn off the heat and let the jars rest in the water for 5 minutes.
- Then, use the jar lifter to carefully remove them and place them on a towel where they won’t be disturbed.
- After 12–24 hours, check your seals. To do this, press the center of each lid — it should not pop up or move. Try gently to lift the lid with your fingers; if it stays put, you’ve got a solid seal — yay!
- Label and date your jars, then store them in a cool, dark place. Properly sealed jars of blueberry jam should last up to 2 years on the shelf.


Altitude Adjustment Chart
| Altitude | Add This Time |
|---|---|
| 1,001–3,000 ft | +5 minutes |
| 3,001–6,000 ft | +10 minutes |
| 6,001–8,000 ft | +15 minutes |
| 8,001–10,000 ft | +20 minutes |
Safety & FAQs About This Homemade Jam
Read this article for more information on making and canning jam, and this one about ensuring safe canned food.
Storage
Additions, Substitutions, and Variations
It is important not to alter ingredients in recipes meant for canning, but feel free to change it up if your jam will be eaten fresh or stored in the fridge or freezer.

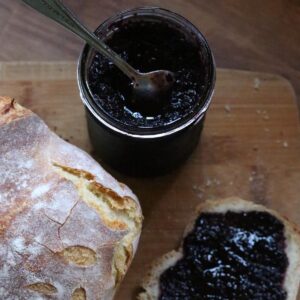
How to Serve Blueberry Jam
Homemade blueberry jam is wonderful on:
I hope this easy blueberry jam recipe helps you make the most of your harvest!
Join the List
Subscribe
For more homestead recipes, make sure to sign up for my newsletter so you don’t miss a post!
Did you make this recipe?
We’d love to see! Tag @heartwood_holler_homestead on Instagram! #heartwoodholler (And then come back and leave a review!)
I hope you love this Blueberry Jam Recipe! If you make it, be sure to leave a rating so I know how you liked it!
Pin It For Later!

Easy Homemade Blueberry Jam Recipe
Want a printer-friendly version of this recipe? (Enter your email to get it instantly.)
Equipment
- Large pot
- Wooden or metal spoon
- medium bowl
- large bowl
- Potato masher (for fresh berries)
- Food processor (for frozen berries)
- Ladle
- Storage containers (for fridge or freezer jam)
- FOR CANNING
- Glass jars (half-pint or pint size)
- Water bath canner
- Funnel, jar lifter, headspace tool, and magnetic jar lifter
- New lids and rings
- Paper towel or clean cloth to wipe rims
- Kitchen towel
Ingredients
Blueberry Jam With Pectin
- 6-7 cups Fresh or Frozen Blueberries
- 4 cups Sugar
- 1 1¾ oz. boxSure Jell Pectin
- Optional: 1/4 cup bottled lemon juice or 1 teaspoon citric acid
Without Pectin
- 9 cups blueberries
- 4 cups sugar
- 1 tsp citric acid or ¼ cup lemon juice
Instructions
Before you begin
- Inspect each jar for chips or cracks—especially along the rim. Even a small chip can prevent a proper seal.
- Preheat your oven to 225°F. Wash the jars and lids in very hot, soapy water, then place the jars in the oven to keep them warm until you’re ready to fill them. (I don’t sterilize my jars first, see why here.)
- Fill your water bath canner halfway with water and begin heating it on low.
- In a small saucepan, heat your lids on low with just enough water to cover them. (Don’t boil; just warm them.)
How to Make This Blueberry Jam Recipe (Step-by-Step) – With Pectin
- Gather your ingredients and supplies.
- Measure 6-7 cups of blueberries into a large bowl.
- In a medium bowl, add 4 cups of sugar and set aside.
- If using frozen berries, pulse them in a food processor to chop. (Skip this step for fresh berries.)
- Place the berries in a large saucepan over medium heat.
- Add one box of Sure Jell pectin and stir.
- Cook over medium-high heat, stirring frequently, until it reaches a full rolling boil that cannot be stirred down. (Mash fresh berries during this step.)
- Add the sugar and stir to dissolve.
- Continue cooking until the jam reaches a full rolling boil again. Once it does, boil for exactly 1 minute, then remove from heat and skim off any foam on the top of the jam. The jam will still be like liquid at first, but it will set up quickly as it cools.
- You can either:
- Let the jam cool to room temperature and store in the fridge or freezer, or
- process in a boiling-water bath canner for shelf-stable jars.
How To Make Blueberry Jam Without Pectin
- Follow steps 1–5 from the recipe above (using the ingredient ratios listed here).
- Add the sugar, stir until dissolved, and slowly bring the mixture to a boil.
- Cook rapidly to the gelling point, stirring often to prevent sticking.
- Once the mixture thickens, remove from heat and skim off any foam.
- Continue with step 10 in the recipe above.
How to Can Blueberry Jam (Water Bath Method)
- mmediately after finishing your homemade blueberry jam, ladle the hot jam into your warm jars from the oven, leaving ¼ inch of headspace at the top.
- Wipe each rim with a damp towel to remove any residue — this step helps ensure a strong seal.
- Use your magnetic lid lifter to place a warm lid on each jar. Screw on the bands fingertip tight (snug but not overly tight).
- Use your jar lifter to carefully lower the filled jars into the canner, spacing them evenly.
- Add more hot water if needed until the jars are covered by at least 1 inch of water, then cover with the canner lid.
- Turn the heat up to high. Once the water reaches a full rolling boil, start your processing time.
- Process the jars for 10 minutes (adjusting for altitude if needed — see chart below). I often add an extra 5 minutes to the processing time for good measure.
- When the time is up, turn off the heat and let the jars rest in the water for 5 minutes.
- Then, use the jar lifter to carefully remove them and place them on a towel where they won’t be disturbed.
- After 12–24 hours, check your seals. To do this, press the center of each lid — it should not pop up or move. Try gently to lift the lid with your fingers; if it stays put, you’ve got a solid seal — yay!
- Label and date your jars, then store them in a cool, dark place. Properly sealed jars of blueberry jam should last up to 2 years on the shelf.
Notes
| Altitude | Add This Time |
|---|---|
| 1,001–3,000 ft | +5 minutes |
| 3,001–6,000 ft | +10 minutes |
| 6,001–8,000 ft | +15 minutes |
| 8,001–10,000 ft | +20 minutes |


Yumm! I looove blueberry jam. Thank you so much for the detailed instructions from fresh berries to canned jam. It sounds so easy to follow. I hope to have lots of blueberries in my garden some day to make this!! When I lived in WA I was in the middle of several huge blueberry and raspberry farms. Berries as far as you could see and several organic ones too. Unfortunately I don’t know of any organic u-picks in my area now, but my neighbor set me up with a bucket full this summer!
That’s great – good neighbors are the best! Azure Standard is in WA, so I wonder if any of the farms you mentioned were theirs? We hope to have our own plants some day as well!
I’m not sure where they get them, but most of the berries that grew around me in Washington were from sprayed fields, which was a real bummer. We only had a few small farms opting to go organic. Seeing the crop dusters fly overhead even on harvesting day made me quit buying commercial blueberries and raspberries. I’ll have to try the frozen ones from Azure next year, never thought of that, it’s a great idea.
I’m glad that I tried as I usually only make strawberry jam. No my husband I loved it!
Thanks Jasmin!
What a great recipe! We love making our own jams & this one is perfect!
Thanks, fresh jam is the best!
Blueberry jam is one of my favorites, can’t wait to make it!
Hope you love it!
This looks so delicious that my mouth is watering! It’ll be perfect with my homemade sourdough bread. Thanks for sharing!
That will be delicious!
Easy and delicious jam. Love having some leftover to can so we can avoid store bought this winter!!
Yes, time to stock up the pantry!
Love the story behind this recipe!
Aww, thanks!
Superb post however , I was wanting to know if you could write a litte more on this
topic? I’d be very grateful if you could elaborate a little bit further.
Thanks!
Thank you! I would be glad to try and answer any other questions you have. Feel free to send me an email!