How to Can Venison in a Pressure Canner (Raw Pack Method)
Turn wild game into home-canned meat by learning how to can venison in a pressure canner! This method is a great way to save valuable freezer space and store your meat in jars for quick meals during busy weeks, while also stocking your pantry for long-term food security.
Want a printer-friendly version of this recipe? (Enter your email to get it instantly.)
Equipment
- Pressure canner
- Wide mouth jars (pints or quarts)
- Lids and rings (new lids)
- Headspace tool (or butter knife)
- Jar lifter (a lid lifter is also helpful)
- Funnel
- Knife
- cutting board
- Bowl
Ingredients
- Deer meat (cut into cubes)
- Salt: 1/2 teaspoon for pints and 1 teaspoon for quarts (optional)
Instructions
- Prep the meat: Trim silver skin and fat, cut into chunks, and refrigerate.
- Prep the jars: Check jars for chips. Wash jars and lids. (Optional: warm jars and lids.)
- Prep the canner: Follow your canner’s instructions for filling and heating.
- Remove meat from refrigerator: Take the prepared venison out so it’s ready to pack.
- Add salt (optional): Add 1 teaspoon to each quart jar or ½ teaspoon to each pint jar.
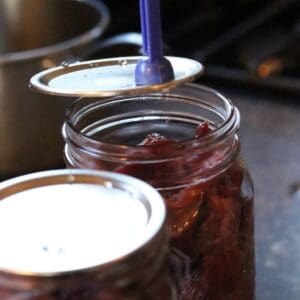
- Pack the jars: Fill warm jars loosely with raw venison, leaving 1 inch of headspace at the top.
- Remove air pockets: Slide a butter knife or headspace tool down the inside of the jar and carefully drag it around the perimeter to release trapped air. Adjust meat if needed to maintain proper headspace.
- Clean rims and apply lids: Wipe jar rims with a clean, damp cloth. Place lids on jars and screw bands on fingertip tight.
- Load the pressure canner: Using a jar lifter, place jars into the prepared pressure canner, leaving space between jars as recommended by the manufacturer.
- Vent the canner: Secure the lid and heat on medium-high until a steady stream of steam escapes. Vent steam for a full 10 minutes.
- Bring to pressure: Heat the canner according to the manufacturer’s directions until it reaches the correct pressure for your altitude. Begin timing only once pressure is fully reached and maintained.
- Process jars: Pints – 75 minutes; Quarts – 90 minutes. Maintain pressure for the full time.
- Cool the canner: Turn off the heat and let the pressure drop naturally until the canner is fully depressurized.
- Remove jars: Carefully open the lid away from you and use a jar lifter to remove jars. Place on a towel to cool.
- Cool and check seals: Let jars cool undisturbed for 24 hours. Check seals, remove rings, label jars, and store in a cool, dark location.
Notes
Tips & Notes:
- No added liquid needed: The venison releases its own juices during canning, filling the jar with flavorful broth.
- Do not overpack jars: Leave some space for the meat to settle naturally.
- Canner venting: Vent the canner for exactly 10 minutes—no longer. Processing beyond recommended time can warp the canner.
- Salt is optional: Add salt before canning if desired; other seasonings can be added later when cooking.
- Jar safety: Warm jars before filling to prevent breakage. Preheating lids in warm water is recommended, but boiling isn’t necessary.
- Storage: Keep sealed jars in a cool, dark place. Best quality is within 12–18 months. Always check seals before using.
